HOME ABOUTINTERIORSRECIPESBEAUTYPRINTABLESTUTORIALS SHOPFEATURED

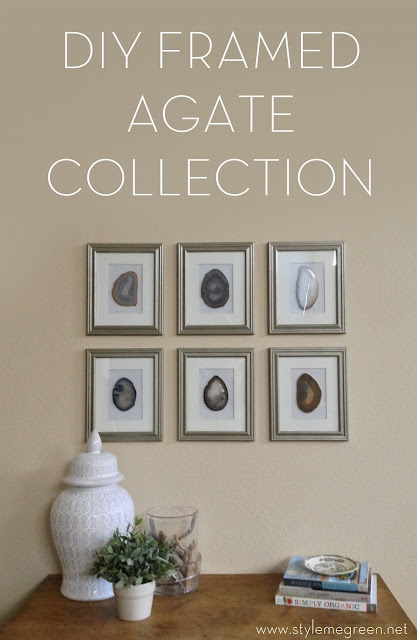
FRAMED AGATE COLLECTION

I have been searching for some interesting art ideas for the wall that is weirdly angled between our foyer and living room. We've had a movie poster hanging there since the day we moved in, 48" of Rita Hayworth as Gilda, in all her glory. I've had this poster since high school. (Yes, I was a super interior design geek even then- I felt like N'sync posters and the like cluttered the look of a room, but a framed movie poster was much more sophisticated.) So when we moved to our post-college home I wanted something a little less "teenage dream," and a little more "Hey, I'm a real interior designer, I promise."  But it takes me forever to make design choices in my own home, so this is a huge step for us.

We tend to gravitate toward collections in this home because we have 12' ceilings, which makes for a lot of ground wall to cover- and because collections inspire us. We've always loved going to museums and spending hours in the natural history wings, wandering through the dioramas and gazing at the fossils. When I saw what was hanging over the tub in this showhouse in Utah I knew exactly what we needed for our space. 


Even though John loves agates and geodes, and I love pyrite- we selected agate slices to frame, because they were thin, yet colorful and would add dimension to space. I ordered my agates from Sonya Masur on Etsy.  Check out her shop, she has so many great stones, and her agate coasters were perfect for this project. I tested out one agate in a frame prior to purchasing, because I did not want a shadow box frame.  and they were thin enough to rest against the glass, and still get the back of the frame on, I did have to pop the rubber feet off the back of the coasters, but they came off without a snag.


To complete the look I taped a piece of biscuit colored card stock to the back of my mat, and because I ran out of double stick tape I used a fancy tape loop on the back of the agate. Simple place the agate in the center of the mat and put the frame back together. I used frames from Michael's Craft Store, I also used the same frames for this project. And I stuck with my favorite brand of metallic spray paint, Rustoleum universal metallic - but this time I got the hammered metal, in the rosemary finish, it has a great greenish silver color. It's from Home Depot.


CREAMY CILANTRO LIME DRESSING

This is a super simple, homemade cilantro dressing that we like to add to tacos, or Southwest style salad. I've seen a few variations online but most called for mayo and a packet of processed Ranch dressing mix. We like to keep things pretty basic around here- so I started making homemade ranch mix in a decent sized batch a while ago, you can safely store it for about 3 months. And as a general rule if a recipe calls for mayo, I always substitute Greek yogurt, it cuts down on fat and has a fair amount of protein, its win, win! I've included the dressing recipe, and the homemade ranch dressing mix as well, but be warned that you will become addicted!


Ingredients
3/4 cup cilantro chopped, no stems
1 cup plain Greek yogurt
1/2 cup milk
juice of 1 lime
2 Tbs homemade ranch dressing mix (recipe below)
1 Tbs salsa, or green chilies

Directions:
Puree all ingredients in a blender or food processor until smooth.
Taste and adjust seasonings if necessary, if you want more heat add more salsa or chilies. I like mine mild.


Homemade Ranch Mix

Ingredients:
2 Tbsp. dried parsley
1 1/2 tsp. dried dill weed
2 tsp. garlic powder
2 tsp. onion powder
2 tsp. dried onion flakes
1 tsp. ground black pepper
1 tsp. dried chives
1 tsp. salt


Whisk all ingredients together until blended. If you want a more finely-ground seasoning mix, you can pulse the mixture in a food processor until it reaches your desired consistency.

To Make Ranch Dressing: Combine 1 Tbsp. seasoning mix with 1/3 cup Greek yogurt and 1/3 cup milk, and whisk to combine.

DIY OMBRE T-SHIRT


I am FINALLY getting to some of the DIY projects that have been cluttering up my office. We've had a super busy, fun-filled summer- and between buying a new car, and our summer road trips we finally had an easy weekend at home. This project takes about 15 min. plus running it through the wash. If I had more time I would have boiled my own dye, but I was using this same tub of leftover dye to fix some shirts that got ruined in the wash, so I just used that dye for this project. If you have the time and patience I recommend making your own natural dye, here is a link. 

Supplies:
T-shirt
Dye
Basin/sink
Rubber Gloves
Hanger
Hair Clips


Directions:
1. Follow the instructions for mixing your dye, and be sure to read the safety and cleaning labels because when they say it will dye your sink purple, they don't lie. (Stainless is easier to clean than white porcelain, so line your sink with a wash tub if you are unsure.)
2. I got my t-shirt wet first, and used a chip clip and a hair clip to hold back the sleeves from the dye. Hang your shirt on a hanger and slowly begin to fold it into the dye.
3. Once you have reached the desired height of your color lift your shirt out, you only want the color at the top of the shirt to be submerged for about 1 second.
4. Slowly pull the shirt out, I mentally divided it into 3 parts and let the shirt sit for about 3 min. at each level. At this point I felt like the bottom looked great, but that the line between the white and the first bit of color was too harsh, so I diluted my dye with some water, and I dipped it back in about an inch above my previous line. (it was so much better, so I recommend this technique for blending the color into the white.)
5. Then empty your dye and rinse the shirt until the water runs clear. Make sure you don't let the dye run into the white part of the shirt while rinsing. Hold the shirt with the white on top and let the faucet run through the dye until its clear. (If you have a sprayer on your sink it helps to use this too.)
6. Wash the shirt according to your dye instructions. Be aware that the white part of your shirt will probably get some of the dye run off in the washing machine, but that it's not a lot, or even enough to really worry about, and it helps the shirt look more blended overall, and not like stripes. You can see in the last two images above the shirt before washing and after washing.

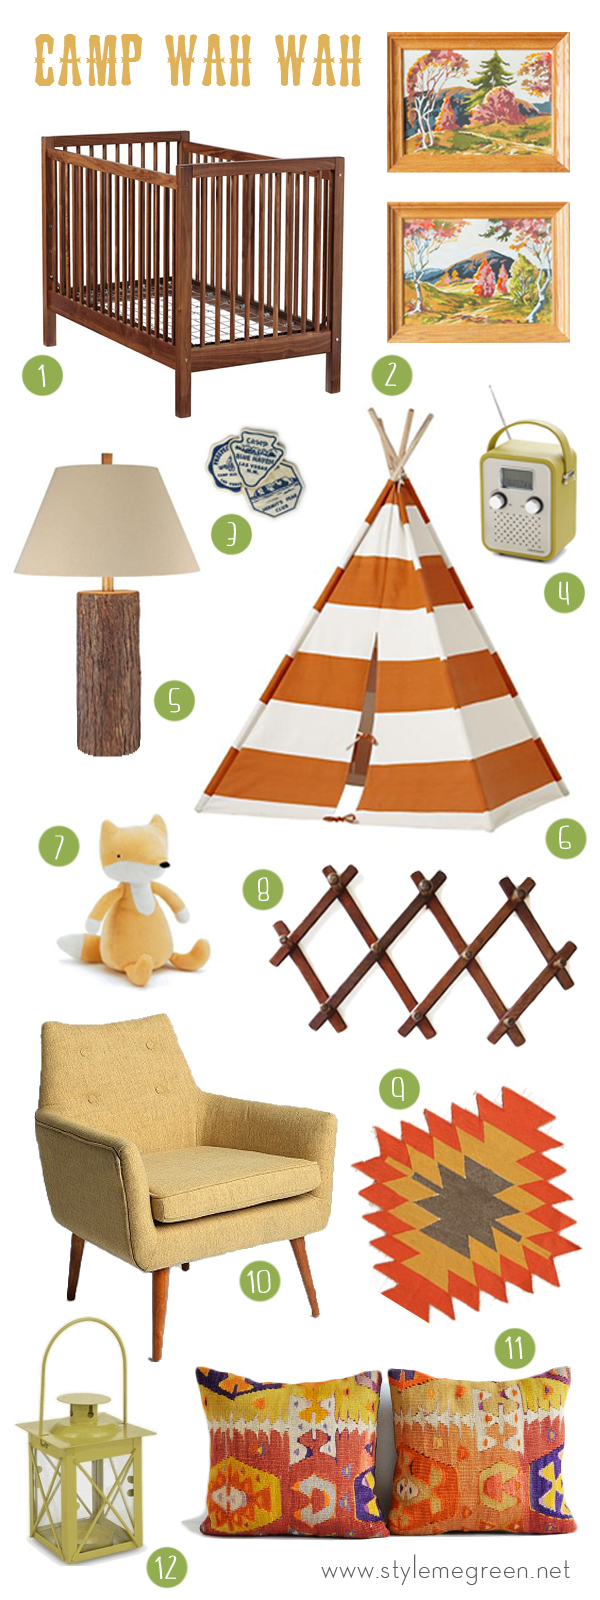
CAMP THEMED NURSERY INSPIRATION

Remember this post about nursery inspiration? How could you forget, it was just last week. In case you are just joining us, I was really inspired by a paint by numbers mural I saw on Land of Nod's website. It was my jumping off point for this design. A good friend was having a baby boy and asked me to create a fun, unique space that could grow with their son.


1 / 2 / 3 / 4 / 5 / 6 / 7 / 8 / 9 / 10 / 11 / 12